Table of Contents
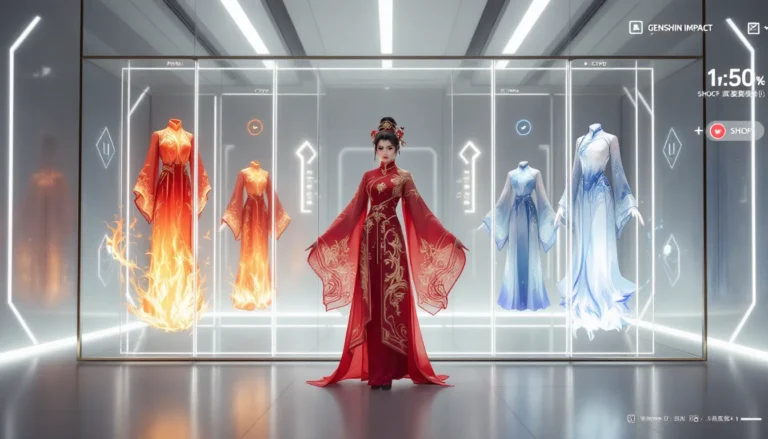
ToggleEmilie burst onto the Genshin Impact scene as a fresh addition to Dendro DPS options, bringing elegant swordsmanship and nature-based mechanics that instantly caught the community’s attention. Whether you’re considering pulling for her or already have her sitting in your roster, understanding her kit, optimal builds, and team synergies is crucial to unleashing her full potential. This guide breaks down everything you need to know to turn Emilie into a powerhouse, from artifact priorities to advanced combo rotations. Players are discovering that she fills a unique niche in the current meta, offering both consistent damage output and surprising versatility in team compositions. By the time you’re done reading, you’ll know exactly how to build her, which teammates complement her best, and how to maximize her damage in both overworld exploration and Spiral Abyss challenges.
Key Takeaways
- Emilie is a 5-star Dendro sword DPS with unique Parasitic Fauna mechanics that reward intelligent ability sequencing and offer strong team versatility for both overworld and Spiral Abyss content.
- Gilded Dreams (4-piece) is the optimal artifact set for Emilie, paired with Elemental Mastery sands, Dendro Damage goblet, and Crit stats on circlet to maximize her personal and reaction damage.
- Primordial Jade Cutter is the best 5-star weapon choice, though high-refinement 4-star options like Iron Sting provide excellent value and only 15-20% less damage than top-tier 5-stars.
- Emilie excels in Bloom/Hyperbloom teams with characters like Nahida, Kokomi, and Fischl, generating massive reaction damage through team synergy while maintaining smooth rotations.
- Prioritize leveling Emilie’s Elemental Skill to 9 first, as it forms the core of rotations and Parasitic Fauna generation—reaching level 80 ascension with 8-8-8 talents provides solid performance without endgame resource demands.
- Master the standard rotation of Normal Attacks → Skill → swap to off-field teammates → return to Burst to unlock Emilie’s full damage potential and maintain consistent Hyperbloom triggers.
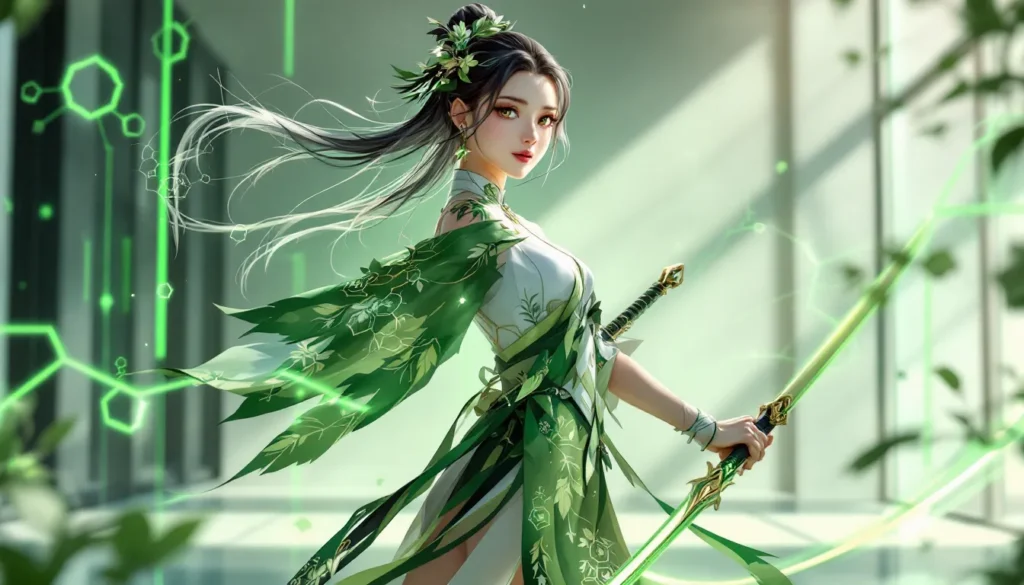
Who Is Emilie and What Makes Her Special?
Emilie is a 5-star Dendro sword user who excels as a main DPS carry with exceptional energy generation and off-field support potential. Her design centers around Parasitic Fauna mechanics, a unique system that rewards intelligent ability sequencing and party composition. Unlike some Dendro characters that rely heavily on specific reaction enablers, Emilie’s toolkit provides flexibility, allowing her to function effectively in multiple team archetypes.
What sets her apart is her ability to generate both personal damage and team energy while applying Dendro consistently without burning through cooldowns. Her elegant, nature-themed kit appeals to players who want a character that feels powerful and rewarding to pilot without requiring frame-perfect execution or massive gear investment.
Emilie’s Element and Weapon Type
Emilie wields a sword and commands the Dendro element, positioning her alongside characters like Alhaitham and Nahida in the ecosystem. As a sword user, she inherits the mobility and attack speed benefits typical of that weapon class, making her responsive and fluid during combat. Her Dendro affiliation opens doors to powerful reactions: Dendro+Hydro triggers Bloom and Hyperbloom, Dendro+Pyro creates Aggravate and Burning, and Dendro+Electro generates Catalyze and Hyperbloom.
Her base ATK at level 90 sits at 311 with a Crit Rate substat, making her naturally inclined toward Crit-focused builds. The sword slot is crowded with strong options like Nahida supports and Alhaitham carries, but Emilie carves her own path through her distinctive mechanics and rotational flexibility.
Unique Mechanics and Playstyle
Emilie’s Parasitic Fauna system is her defining mechanic. When she deals damage with her Elemental Skill or Elemental Burst, she generates stacks that enhance subsequent attacks and reactions. This encourages deliberate sequencing, grouping abilities together amplifies their impact, rewarding skilled play and creating satisfying damage spikes. Unlike pure off-field damage dealers, she demands active time in combat, making her feel engaging for players who enjoy hands-on piloting.
Her playstyle emphasizes Dendro application consistency combined with burst windows. She’s not flashy or over-the-top in animation, but her damage output is genuinely impressive when rotations are executed correctly. Her energy costs are moderate (relative to other 5-stars), and her cooldowns align naturally with team rotations, making her a smooth fit into existing teams or as the focal point of new compositions. Whether you’re farming domains or tackling Abyss floors, her versatility shines, she doesn’t feel neutered in any particular scenario, which speaks to solid character design.
Emilie’s Abilities and Talent Breakdown
Understanding Emilie’s toolkit in granular detail is essential for optimizing your damage and playtime. Each ability builds into her rotation differently, and knowing their scaling, costs, and mechanics directly impacts how you’ll prioritize talents and gear.
Normal and Charged Attacks
Emilie’s Normal Attacks form the baseline of her damage output during downtime, when her abilities are on cooldown, she’ll be swinging her sword. Her attack string has decent scaling (around 40-50% per hit depending on talent level) and flows smoothly, making basic attacking feel responsive. The attack animation is swift, so frame efficiency is solid compared to slower sword users like Kazuha or Ayaka.
Her Charged Attack costs stamina but delivers meaningful damage, roughly 100-110% scaling at base level. The important detail: her Charged Attacks also apply Dendro and generate Parasitic Fauna stacks. This means even without Elemental Skill or Burst up, she can maintain momentum and continue contributing. Charged Attacks are generally used as fillers when waiting for cooldowns or to apply additional Dendro when enemies are scattered.
For most damage profiles, Normal Attacks consume roughly 20-30% of your rotation’s duration, with the remaining time split between abilities and Charged Attacks. The exact ratio depends on your artifact investment and whether you’re using an Energy Recharge weapon or pure damage.
Elemental Skill
Emilie’s Elemental Skill (cooldown: 10 seconds) is her bread and butter. It deals substantial Dendro damage, generates multiple Parasitic Fauna stacks, and has straightforward mechanics with no complex positioning requirements. The scaling is roughly 200-220% at level 6, scaling to 300%+ at level 9. This ability is off-field friendly too, if you swap to a teammate while the cooldown is running, it counts down naturally, meaning Emilie doesn’t need 100% active time.
The skill applies Dendro in an AoE, making it efficient for clearing groups of enemies. Its cooldown timing aligns well with rotations, approximately 2-3 cycles of Skill use per rotation depending on your team’s Energy Recharge. The key tactical element: stacking the Skill together (using it twice in rapid succession) amplifies the Parasitic Fauna effect massively, creating burst windows. Beginners often don’t realize this synergy and waste stacks by spreading ability usage too thinly.
Elemental Burst
Emilie’s Elemental Burst (cost: 60 Energy) is her ultimate damage spike and the primary source of Parasitic Fauna stack generation. It deals heavy Dendro damage, applies the element in a large radius, and creates lingering damage. The base damage at level 6 is roughly 150-170%, scaling to 220%+ at level 9.
Energy management is crucial here, 60 cost is moderate for a 5-star, and her kit generates decent Energy from her Skill and Normal Attacks. Most rotations see her Burst ready every 12-15 seconds with proper Energy Recharge investment (typically 140-160% ER). Unlike burst-reliant characters like Raiden Shogun, Emilie doesn’t need a dedicated Batterie to function, but having one improves rotation smoothness and allows you to focus more on damage stats.
The Burst’s lingering damage component means it contributes damage even after you swap off, making it valuable in multi-character rotations. This is why Emilie works so well in teams with off-field Hydro or Electro applicators, her Burst sets up the stage for strong reactions from teammates.
Best Artifact Sets for Emilie
Artifact selection defines whether Emilie feels sluggish or explosive. The right set transforms good builds into exceptional ones, and this section cuts through the confusion about what actually works versus what sounds good in theory.
Recommended Artifact Combinations
Gilded Dreams (4-piece) remains the top-tier recommendation for most Emilie builds. It grants Dendro Damage Bonus and boosts Elemental Mastery, directly scaling both her personal damage and reaction damage. The requirement to have 3 different elements in the party is trivially easy to meet in virtually any Emilie team composition. The 2-piece (Dendro DMG +15%) is also solid if you haven’t farmed a complete 4-piece yet.
Deepwood Memories (4-piece) is the secondary choice, particularly when you’re running reaction-heavy teams where reducing enemy Dendro resistance further multiplies damage. It applies -30% Dendro RES to enemies, which stacks multiplicatively with other sources. Use this if your team doesn’t already have a Dendro resistance shred option and you’re prioritizing overall team damage over Emilie’s personal numbers.
The 2-piece + 2-piece hybrid approach is perfectly viable, pairing Gilded Dreams 2-piece with Deepwood Memories 2-piece gives you both bonuses while farming efficiency is better than chasing perfect 4-piece drops. The numerical difference is small enough that consistency matters more than theoretical optimization.
Avoid pure ATK-stacking sets like Shimenawa’s Reminiscence or Gladiator’s Finale unless you’re dealing with early-game gear constraints. Dendro-specific sets were designed around how Dendro reactions work, and they outperform generic sets by a significant margin, roughly 15-25% more damage in optimized team scenarios.
Main Stats and Substats Priority
Circlet (Head): Crit Rate or Crit Damage, depending on your existing Crit ratio. Aim for a 70:140 ratio as a baseline (70% Crit Rate, 140% Crit Damage). If you’re below this, prioritize Crit Rate. Once you’re comfortable above it, switch to Crit Damage for higher ceiling damage.
Sands (Timepiece): Elemental Mastery is the strongest choice for virtually all Emilie teams, assuming you’re running a reaction enabler (Hydro/Electro). The conversion from EM to damage via reactions typically exceeds ATK% scaling. If you’re running Emilie in a pure Dendro team (e.g., Nahida + off-field Dendro), ATK% becomes more relevant, but this is a niche scenario.
Goblet (Cup): Dendro Damage Bonus is non-negotiable. There’s no scenario where ATK% or other stats replace this. Dendro DMG scales all her abilities and works multiplicatively with other damage multipliers.
Substats Priority (in order):
- Elemental Mastery (160-200 total is a comfortable target)
- Crit Rate / Crit Damage (continuing your ratio balancing)
- ATK% (helpful but not mandatory if EM and Crit are strong)
- Energy Recharge (only if you’re struggling to burst off-cooldown, 140-160% is the sweet spot)
- Avoid: Flat ATK, Flat HP, Flat DEF (unless you’re early-game)
Artifact farming is the most time-intensive part of Genshin progression. Spending 2-3 weeks on Dendro domains is realistic before you get a “good enough” set. Don’t get caught in the perfection trap, a solid 4-piece with one mediocre substat beats waiting for perfect rolls.
Optimal Weapon Choices
Your weapon choice dramatically impacts Emilie’s performance. Unlike artifacts, weapons are easier to optimize since the pool is smaller, and swapping one sword to another takes seconds.
Five-Star Weapon Recommendations
Primordial Jade Cutter is arguably the most flexible 5-star choice. The Crit Rate substat relieves pressure on artifacts, and its passive grants ATK Bonus based on Max HP. Since most Emilie builds don’t stack HP specifically, the passive typically provides a steady 30-35% ATK increase. This weapon works excellently on any Emilie build and pairs perfectly with Crit Damage circlet builds.
Nightfall’s Whisper (if you own it from earlier Genshin patches) is a strong Dendro-specialized option that increases Dendro DMG and reaction damage. The secondary stat and passive are both tailored for Dendro characters, making it thematic and practical. But, it’s a limited weapon from old banners, so most players won’t have access.
Skyward Blade is underrated for Emilie specifically. The high base ATK, Energy Recharge substat, and passive that triggers additional damage on Crit make it surprisingly effective. It’s especially valuable if you’re struggling with Energy management or want to maximize uptime.
The Flute (5-star) works in a pinch but isn’t optimized for Dendro reaction damage like specialized weapons. It’s a valid choice if you have one with good substats and lack better options.
Generally, Primordial Jade Cutter edges out other 5-stars for most players due to its raw stats and universal appeal. If you’re specifically building her for reaction-heavy teams, checking whether Nightfall’s Whisper matches your account is worth doing.
Four-Star and F2P Weapon Alternatives
Emilie performs excellently with 4-star weapons, the gap between 5-star and well-built 4-star is smaller than with other characters. This is great news for F2P and low-spenders.
Iron Sting is likely the best 4-star free option available to all players. It provides Elemental Mastery and boosts Dendro Reaction DMG. The passive triggers after Dendro application, scaling your reactions directly. For pure budget builds, Iron Sting hits above its weight class.
Kagotsurube Isshin (from Inazuma’s weapon refinement system) offers ATK% and cooldown reduction. If you’ve unlocked this weapon, it’s a solid alternative. The cooldown reduction is situationally useful for maintaining rotational flow.
The Black Sword is a solid option if you have Battle Pass access. Crit Rate substat removes some artifact pressure, and the healing passive isn’t wasted, it provides a minor survivability buffer.
Amenoma Kageuchi provides Energy Recharge and ATK%, making it a good budget pick for players managing energy generation. It’s not optimal for damage, but it enables smoother rotations.
Refinement matters: A Rank 5 Iron Sting often outperforms a Rank 1 5-star weapon because of how reaction scaling works. If you have a high-refinement 4-star, don’t feel obligated to pull for a 5-star weapon.
For comparison purposes, the damage ceiling with Primordial Jade Cutter + perfect artifacts versus Iron Sting + comparable artifacts is roughly 15-20%. The 4-star option trades some peak damage for accessibility, perfectly acceptable for overworld and domain content, and still viable for Abyss.
Best Team Compositions for Emilie
Emilie’s strength partially lies in her team flexibility. She functions as a main DPS, a sub-DPS, or even a reaction catalyst depending on your composition. Understanding which roles suit your playstyle and resources is key.
Main DPS Builds and Supporting Characters
When Emilie carries a team (main DPS role), she needs teammates providing:
- Off-field Dendro application (to maintain Dendro status for reactions)
- Reaction enablers (Hydro or Electro for Bloom/Hyperbloom or Aggravate reactions)
- Defensive utility (shields or healing)
Emilie + Nahida + Kokomi + Fischl is one of the strongest compositions available. Nahida handles off-field Dendro application while providing Elemental Mastery to the team, Kokomi applies Hydro and heals, and Fischl adds Electro for Hyperbloom triggers. This team generates staggering damage through reaction stacking, Bloom cores are triggered by Fischl’s Electro, scaling off accumulated EM. The synergy is tight, rotations flow naturally, and the team handles most content effortlessly.
Emilie + Zhongli + Nahida + Yelan replaces Kokomi with Yelan for pure offense. Zhongli’s shield removes healing requirements, and Yelan applies off-field Hydro while boosting team damage. This team sacrifices sustainability for raw DPS, suitable for players comfortable with positioning and who want maximum kill speed. The composition is less forgiving if you’re learning Emilie’s rotations, but the damage output is exceptional.
Emilie + Fischl + Diona + Xingqiu leans toward Aggravate reaction (Dendro + Electro). Fischl applies off-field Electro, Xingqiu handles off-field Hydro (triggering some Blooms as a bonus), and Diona provides healing and shields. This team is budget-friendly relative to options requiring Kokomi or Yelan, and it works excellently if you already have these older 4-stars built.
Team building follows a principle: pick one reaction to optimize, then fill the remaining slots with utility or sub-DPS that doesn’t conflict with that reaction. Emilie as the core slots into this structure easily, her off-field teammates don’t need to compete for field time with her.
Reaction-Based Team Strategies
Dendro + Hydro (Bloom/Hyperbloom) is the highest-ceiling reaction for Emilie. Blooms spawn when Dendro and Hydro are applied simultaneously. A third Electro applicator (like Fischl) triggers Hyperbloom, Bloom cores explode with Electro damage scaling off Elemental Mastery. This reaction deals obscene damage if you stack EM on your Electro applicator (targeting 600-800+ EM). The downside: RNG is involved (Bloom cores spawn randomly), and it requires careful positioning to ensure they’re triggered.
Dendro + Electro (Aggravate) is more consistent and slightly lower-ceiling. Applying Dendro to an enemy affected by Electro generates Aggravate stacks, boosting Dendro damage. Fischl is the best Electro applicator for this reaction due to her off-field uptime. The beauty of Aggravate is its simplicity, it scales directly off Crit stats and doesn’t require EM investment, so your Dendro DPS can focus on standard damage builds.
Dendro + Pyro (Burning) is viable but generally underperforms compared to other reactions at Emilie’s level. Burning deals persistent area damage but doesn’t scale well with individual stats. It’s occasionally useful for overworld content where you want persistent DoT, but Abyss prefers the higher-intensity reactions.
Multi-reaction teams are possible but tricky. Running both Hydro and Electro creates overlapping Bloom and Hyperbloom triggers, which maximizes damage but demands careful rotation timing. The complexity is higher, requiring frame-perfect ability sequencing. Most players achieve higher consistent damage by committing to one reaction and optimizing rotation flow.
Resource-wise, Bloom/Hyperbloom teams typically require more investment in off-field characters (especially Kokomi or Yelan for Hydro application). Aggravate teams are cheaper, Fischl alone as a 4-star can carry your Electro application duties, and she’s often already built from other teams.
For comparison, resources from best genshin impact characters to build in 2025 can help you evaluate which teammates fit your account’s current roster strength.
Ascension and Leveling Priority
Optimization extends beyond artifacts and weapons, character and talent leveling directly impacts your damage output. Strategic prioritization means you’re not wasting resources on low-impact upgrades.
Talent Leveling Order
Priority order: Elemental Skill > Normal Attacks > Elemental Burst
Elemental Skill should hit level 9 first. This ability forms the core of your rotation and is the primary source of Parasitic Fauna stacks. Every talent level increases its damage scaling, making incremental improvements noticeable. The cooldown doesn’t reduce with talent levels, but the damage scaling does, so maximizing it is efficient.
Normal Attacks at level 8-9 comes next, though the jump from 8 to 9 is marginal (roughly 3-5% damage increase). Since Normal Attacks comprise 20-30% of your rotation, improving them has solid returns. This is lower priority than Elemental Skill but worth doing once you have resources.
Elemental Burst is actually the lowest priority even though being your damage spike. Why? Because the talent level only boosts its direct damage, not the reaction output it enables. If your Burst is enabling Hyperbloom cores to deal 50% of your team’s damage, the Burst’s talent level matters less than your Electro applicator’s stats. That said, bringing Burst to level 8 is reasonable if you have spare resources.
Crown priority: If you’re spending Crown of Insight (limited resource), use it on Elemental Skill for maximum impact per resource spent. Some players save Crowns and avoid this investment entirely, perfectly valid if you prefer flexibility.
Character Level and Weapon Investment
Emilie benefits from reaching level 90, though the returns diminish significantly past level 80. The difference between level 80 and 90 is roughly 8-10% damage increase. This is noticeable but not game-changing compared to artifact optimization.
Recommended investment path:
- Level 80/90: Unlock her final ascension for the passive talent unlock and level 9 talent cap. This is worth doing eventually.
- Level 80: If resources are tight, this is the practical stopping point. The Ascension 6 material cost is high, and the returns are diminishing.
Weapon leveling should hit 90 regardless of which weapon you use. A level 90 weapon has noticeably higher stats than level 80 (base ATK is roughly 10% higher), affecting all scaling multipliers. Prioritize this before pushing Emilie past level 80.
Mora and EXP material management: Early-game players should focus on getting Emilie to level 80 with talents at 8-8-8 (Skill and Burst at 8, Normal Attacks at 8). This gives solid performance without demanding endgame resources. Late-game players optimize for 9-9-9 talents and level 90.
Resourceslike genshin impact guide: essential tips for new and returning players cover broader account progression strategies if you’re juggling multiple characters.
The bottom line: Emilie’s scaling is front-loaded. Getting her from 0 to serviceable (level 70, talents 6-6-6) costs 20% of the total resources needed to reach “optimized” (level 90, talents 9-9-9). Diminishing returns hit hard, so decide based on your account progression stage.
Advanced Gameplay Tips and Combat Strategies
Understanding Emilie’s kit theoretically is one thing: executing smoothly during actual combat is another. This section covers practical combat mechanics, rotational efficiency, and situational tactics.
Combo Rotations and Timing
Standard rotation (assuming Nahida + Kokomi + Fischl team):
- Enter field with Emilie, perform 3-4 Normal Attacks to generate Energy
- Use Elemental Skill (generates stacks and applies Dendro)
- Swap to Nahida, use Elemental Burst and Skill (applies off-field Dendro and boosts EM)
- Swap to Fischl, use Elemental Skill (applies Electro, triggering Hyperbloom)
- Swap to Kokomi, use Elemental Burst and Skill (applies Hydro for additional Blooms)
- Return to Emilie, use Elemental Burst (consumes stacks for massive spike), then Normal Attacks
- Repeat from step 2 when cooldowns reset
This rotation takes roughly 10-12 seconds and represents one full cycle. Emilie’s field time is roughly 4-5 seconds per cycle, allowing the rest of your team significant active contributions.
Energy management: If your Emilie is struggling to burst off-cooldown, adjust your Normal Attack count in step 1. Aiming for 3-4 Normal Attacks typically generates 30-40 Energy (depending on stats), bringing your Burst online. If you’re using an Energy Recharge weapon or sands, you might need fewer Normal Attacks. Conversely, pure damage builds might require 5+ Normal Attacks.
Stacking mechanics: The Parasitic Fauna mechanic rewards back-to-back ability usage. If you use Elemental Skill twice in rapid succession (before returning to field rotation), stacks accumulate multiplicatively. Example: During energy generation phase, you could use Skill + Burst consecutively, generating maximum stacks before swapping to teammates. This is an advanced optimization but noticeable in damage output (roughly 10-15% difference between executing optimally and casually).
Positioning matters: Emilie’s Skill and Burst have AoE ranges, but Dendro application has a proximity requirement. When enemies are spread out (common in Abyss), position yourself centrally to ensure Dendro hits multiple targets. Conversely, in grouped scenarios, standing at the perimeter allows your off-field teammates to apply reactions from safer angles.
Domain and Abyss Optimization
Domain farming (artifact and talent domains): Emilie performs excellently here because consistent single-enemy focus allows rotations to execute smoothly. Your rotation stays tight, DPS checks are generous, and mistakes have minimal consequences. If you’re unsure about build quality, farms are the perfect place to stress-test rotations and identify timing issues.
Spiral Abyss: This is where team synergy and rotation precision matter most. Emilie faces varied enemy lineups, grouped mobs, single boss enemies, flying enemies that interrupt positioning. Adaptability is required.
- Multi-enemy chambers: Emilie excels. Her AoE Skill and Burst hit multiple targets, and Hyperbloom cores scale with numbers of enemies (more simultaneous Blooms spawn). These floors are often Emilie-favoring matchups.
- Single-boss chambers: Still strong, but positioning becomes simpler (no scatter management). Focus on rotation precision and maintaining Burst uptime.
- Elemental shields: If a floor features Pyro or Hydro shields, your reaction enablers (Fischl, Kokomi) handle them. Emilie’s role is unchanged, maintain rotations and amplify reactions. Don’t get distracted by shield-breaking: let your team composition handle it naturally.
Rotation flexibility in Abyss: Standard rotations are baselines, but you’ll adjust based on enemy positioning and attack patterns. If enemies bunch, feel free to extend your Emilie field time to hit multiple targets with Normal Attacks. If enemies scatter, swap off early to prioritize your reaction enablers’ uptime. The fluidity is what separates “following a guide” from “actually playing the character well.”
DPS checks: Recent Abyss cycles favor Emilie-type fast-paced, reaction-heavy DPS. If you’re struggling with time limits, the issue is rarely Emilie’s kit, it’s likely artifact/weapon investment, team synergy, or rotation precision. Double-check your reaction enablers’ stats before concluding Emilie is underpowered for a specific floor.
Advanced genshin impact strategies: essential tips for mastering the game covers broader Abyss preparation and team-building philosophy if you’re working toward full-star clears.
Conclusion
Emilie represents a well-designed addition to Genshin Impact’s Dendro roster. She’s flexible, rewarding to optimize, and genuinely fun to pilot once you understand her mechanics. Whether you’re building her for casual overworld exploration or pushing Spiral Abyss 36-stars, the framework in this guide provides a solid foundation.
Start with the basics: Gilded Dreams artifacts, Elemental Mastery focus, and a reliable reaction enabler like Fischl or Kokomi. Once you’re comfortable with her rotation, incrementally refine your build, better artifacts, Crit ratio optimization, weapon optimization, and finally talent leveling. The progression feels natural and rewarding because each upgrade meaningfully impacts your damage.
Emilie’s current meta position is strong, and future patches are unlikely to make her irrelevant, her kit is fundamentally sound. That said, always stay updated on patch notes and character balance changes, as the game evolves. Resources like siliconera cover JRPG and anime game news, keeping you informed on Genshin Impact updates and industry shifts.
Most importantly, enjoy playing her. Genshin Impact’s best characters are the ones that click with your playstyle, not necessarily the ones with the highest theoretical damage. Emilie deserves a spot in your roster and an investment of resources, she won’t disappoint.